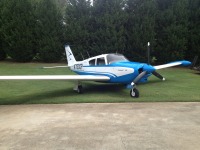
This Forum is a place for Piper Comanche pilots to communicate and discuss technical issues
If you join or reset a password, please check your Spam Email box for emails from Admin at ComancheTechTalk.com
Please put your questions on the forum as well so everyone can read and respond. Someone else might be having similar questions.
All questions or topics on the Forums automatically get sent to the Tech team as well.
Installing the Aussie Horn
If you have completed the install, I'd like to connect the fine folks at Clifton Aero with the shop that did the work. Feel free to email me through the forum.
Thanks in advance!
Maurice

Maurice Hill- Posts: 10
- Joined: Thu Nov 29, 2012 3:51 pm
- Location: Dallas, TX
Re: Installing the Aussie Horn
I have installed the new horn on my Comanche and yes I had trouble with the Loctite setting too fast also. When you heat the horn as described the Loctite sets even faster. I had most trouble installing the balance arm into the horn and had to press it off once. No problems with installing the horn on the torque tube.
You only get 2 chances to heat it to 400*. I honed the horn to the allowable maximum fit and made a fixture to press balance arm into horn. Went together great. I had an old torque tube so I cut a piece off the width of the horn. Slide it in the horn then made a fixture from heavier metal, radius the same as tube on one side, flat on the top. Made a U saddle that would straddle the width of the horn, laid a heavy 1" square bar across my fixture inside the horn, setup the U saddle to mate with 1" bar. Careful align the bolts by sight. Please make sure you have the balance arm alignment correct Hopefully your technician marked top on the balance arm and the same with the torque tube.
I takes very little pressure to seat the balance arm in the horn. Apply the Loctite to the balance arm as you mate them. Again sight alignment of the holes is critical. As the holes begin to align begin to insert the supplied pin to make perfect alignment. The Loctite sets quick so toward the end of the push pressure was about 1000 PSI on my gauge.
Remove the tooling and your ready to slide the horn on the torque tube. That step went fairly easy.
- Tim Weigle
- ICS member

- Posts: 12
- Joined: Sun May 10, 2009 4:07 am


